

Mad Madder LAB – Notes
Some general notes about the process that we make as we continue our dyeing journey. If you have questions, reach out! If you think something should be added here, reach out :)
Dyesource notes:
- Avocado : HOT TOPIC : There seems to be a lot of difficulty when it comes to dyeing with avocado. If done right, you can get a nice pink/coral color. Try letting the seeds dry out and crack open before making a dyebath. They’ll release the pigment easier & are less likely to burn.
- Walnut : this dyesource needs to have its husk still attached, and needs to slow cook for a LONG time. We recommend a crockpot overnight.
- Not all dyestuffs will result how you think. Flowers, leaves, stems & barks from the same plant will even yield different results!
Mordanting & Presoaking:
- Instead of bundles dry material, try soaking individual pieces in mordant before bundling. Fold papers and fabrics before bundling to create ‘tie-dyed’ effect.
- Different ‘resist-like’ effects can be achieved when presoaking individual papers then folding, The water acts like a ‘glue’ and dye will only partially penetrate the edges. Internal sections and/or tags (for example) will create a resist image where they are ‘adhered’ to each other.
- Presoak feathers and place right on top of vintage photos and papers for a resist like look.
- Adding rust to a dye bath as a mordant will create rusty looks on papers and fabrics. When adding gesso and gel medium resists, the rust will react differently to these areas than the substrate.
- Partially place papers on top of the dye bath for a mottled look. Areas touching the bath receive dye, while others do not.
- Experiment by NOT presoaking or mordanting papers. Place dry papers and fabrics into dyebaths to see how the dye ‘pulls’ into the dry material.
Experimentation is KEY:
- Don’t be afraid to dye colors fabrics and papers. Maps, vintage papers, printed fabrics, and Kraft colored tags and envelopes. Not all dye types will result in a change in color, but experiment.
- Experiment with vintage photos for a sepia or monochromatic look. (Be cautious in oversoaking vintage photos. I would start with a shorter soak, check, then continue to soak until desired effect.
- Experiment with dyesources – especially adding modifiers. You’ll be amazed at what a little PHbalance can do!
- Mix dyesources in your original baths, too! If you’re looking for a specific color, try mixing it.
Try adding resist to your pre-dyed fabrics and papers by:
- Applying white gesso/gel medium/modeling paste through a stencil
- Applying white gesso/gel medium/modeling paste to substrate randomly with a palette knife
- Make marks with China pencils – experiment with colored pencils
- Make marks with wax crayons
- Some dyes may react with resist, creating different colors and muted effects.
- Different mediums create different opacities. White gesso and modeling paste create muted resist effects, while gel medium creates a contrasted effect.
Double Dipping:
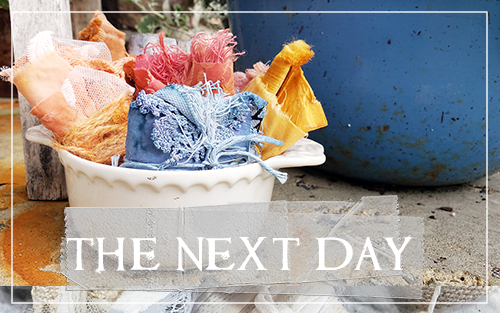
- Place only one part/end of bundle in first dye bath. Let sit overnight. Rinse the next day and place other part/end in a different color dye bath, or modified dye bath of same color.
- Try experimenting with overlapping dyed sections when dipping into bath or leave a ‘white’ space in between areas for a tri-effect.
- Experiment by combining 2 different dye bath colors together, using the color wheel for guidance. Not all combined dye baths will result in expected colors but start with small amounts to test and try new combinations.
Other Dyeable Items:
- Add elastic binding to your dye bath bundles. It makes great closures and attachments for your handmade journals.
- Try fired but unglazed ceramics, the rawer version of the clay should soak up dyebaths well.
- Vintage sheets & other linens make amazing dyeables.
- Whole skeins of natural yarn will make larger weavings more consistent.
Navigation:
Extra
Content
>>>


