
Welcome to the Rusty Bits WORKSHOP!
This technique based instructional is packed full of all the information you need to create amazing rust dyed / transfer effects. I suggest watching all the videos in order once before you dive in. You’ll be surprised by some of the amazing results & it’ll help you pair down which things you want to try first.
There is a supply list at the bottom, but know that you are always encouraged to use what you have on hand & should you have any questions I am easily reachable! Speaking of..
These are the nitty gritty details – basic steps & how-to to get you making amazing rust prints NOW!
After you’ve watched these videos – head to the 2nd part at the end of the page to dive even deeper into the amazingness of RUST DYEING.
Hi-Res Printables
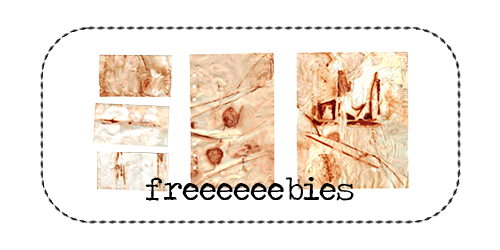
Freebies>>>
There are 3 printable sheets with 5 pieces total included in the purchase of your workshop.
Please remember these are intellectual property (regardless of digital or physical product) owned by me made from my work. There is unlimited PERSONAL use, but sharing or making $ from the printables on a stand alone basis is forbidden. You ARE allowed to create artwork where the printables are less than 25% of the finished work & sell that. If you have any questions please just contact me.
Onto the WORKSHOP!
Video One
what can we dye?
The easy answer : anything porous!
The hard answer : anything porous leaning towards the natural side, meaning not man-made materials.
types of :
ribbon / bias
fiber
yarn / twine
roving / felting wool
rope
fabric
feathers
papers : full sheets / cuts / scraps / vintage / new
wood : bits / cut outs / drift / slices
made from :
silk
cotton (muslin is my favorite!)
wool (sheep, alpaca, llama etc)
canvas
jute & hemp
linen
rice
wood pulp & trees
+++LOADS of other things! we can update this list as questions are raised & discussions are held :)
Video Two
what do we dye with?
Anything rusty. clean & simple. metal based FOUND items that are already rusty will make the best transfers. Go for a walk, hit up your mechanic friends, put the word out. Gears, springs, wires, metal chunks, buckets, cans, bottle caps, washers, screws & nails, saws and or saw blades, old license plates… anything & everything!
Will store-bought rusty stuff work? absolutely. It may take a few tries to get a really good transfer. I’m not 100% sure what the process for rusting store bought items is, but natural rust is 100% good.
The SOLUTION : we need an agent that aides in the oxidation process. I use a 50/50 mixture of water (just tap, but distilled or plain drinking would work just as well) & distilled white vinegar.
designer TIP—
work inside a shallow baking tray. after the first use, rusty dust, flakes n bits will gather in the bottom, only aiding you in your dyeing efforts. tipx2 : pick a RUSTY tray
Video Three
let’s dye!
This process is pretty long, but well worth the effort & it is the place where all the experimentation happens. Layer, wrap & tie your dye-able goods to your rusty goods. Make sure everything is covered in the 50/50 solution. DAMP but not soaking is ideal. Too much water can result in things tearing or floating around. As much contact between rusty bits & dye-able bits as possible is the goal. If things are sort of floating in a soup the results will differ. (which is to say, not a bad thing! Just not our goal.) Tie things tight, make them heavy to press harder together, etc. Once you’ve bundled everything up & your tray is heaping high (hah) take it out & let it rest in the sunlight. 24 hours is ideal.
designer TIP—
you may find having a small tub of the mixture to pre-soak your fibers in will aide you during this part of the process. I would avoid soaking most papers, though.
tipx2 : wrap tightly, tuck things in, experiment here! use rusty wires to hold things together… the transfer will happen from the inside & out this way
Video Four
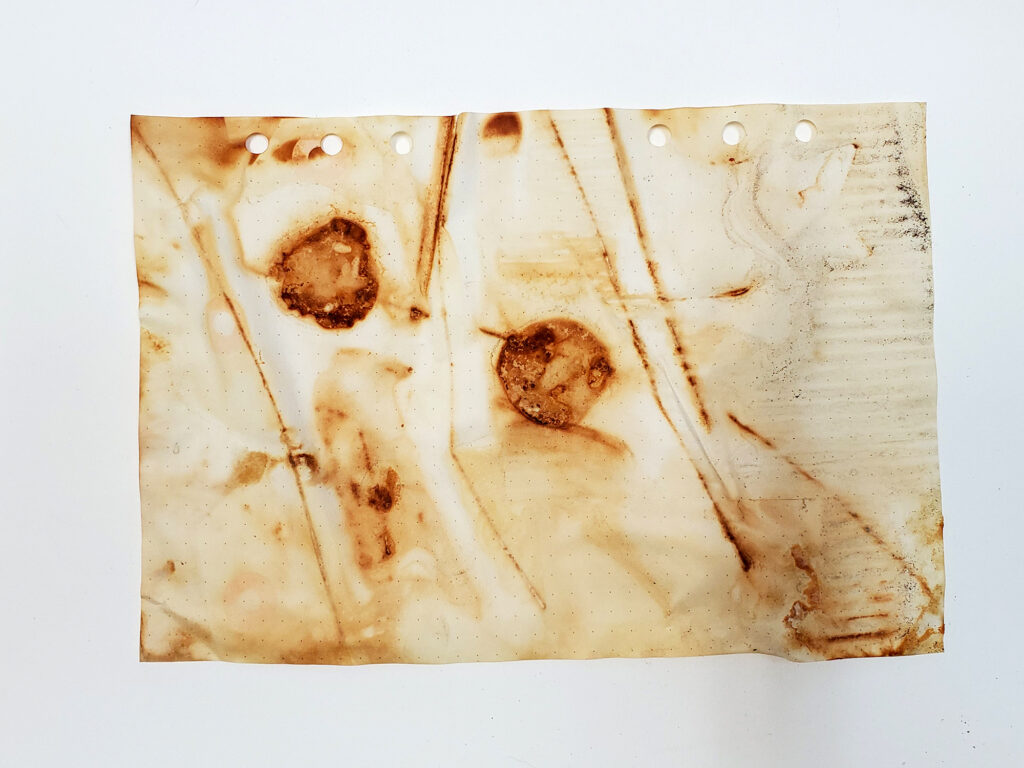
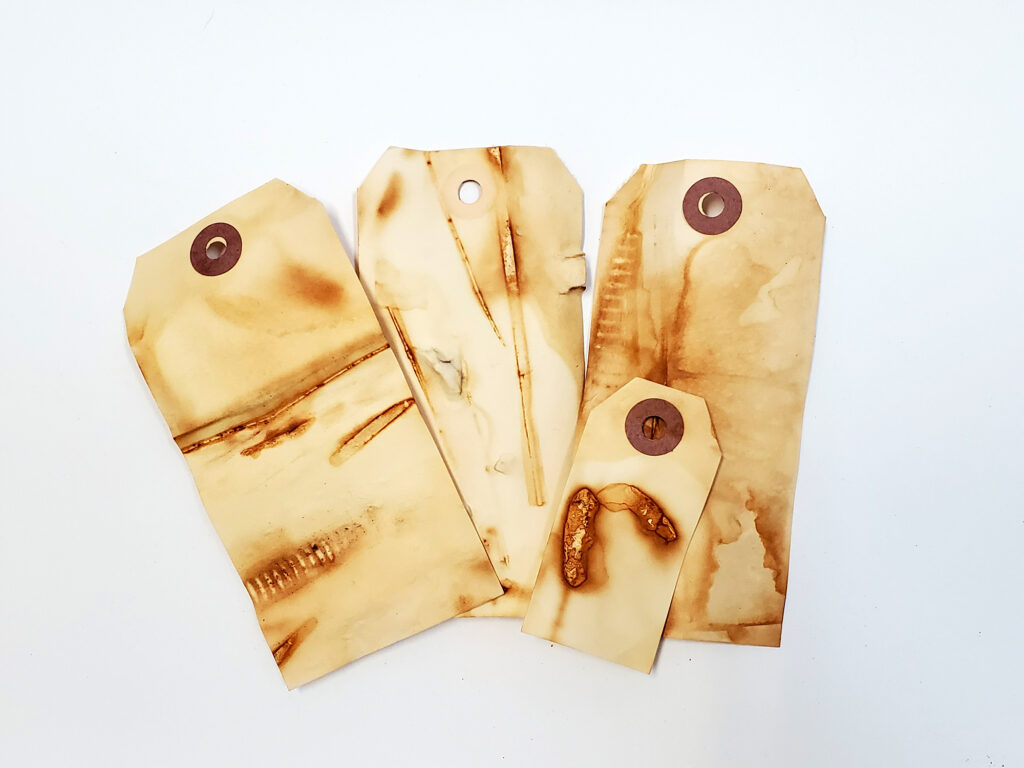
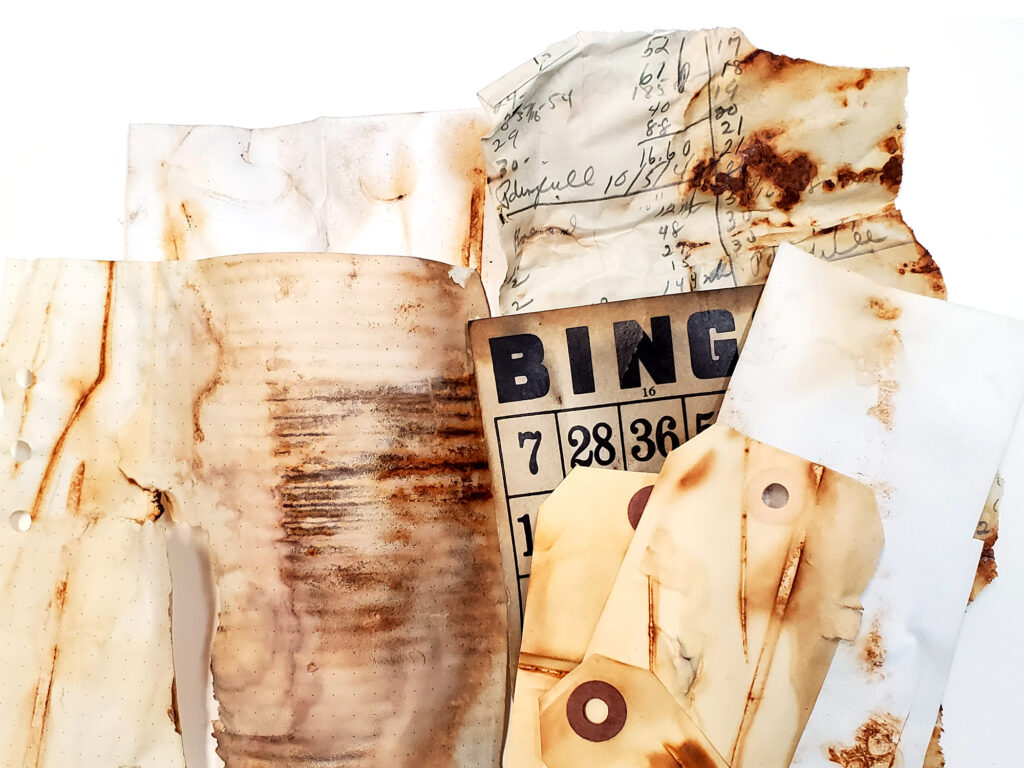
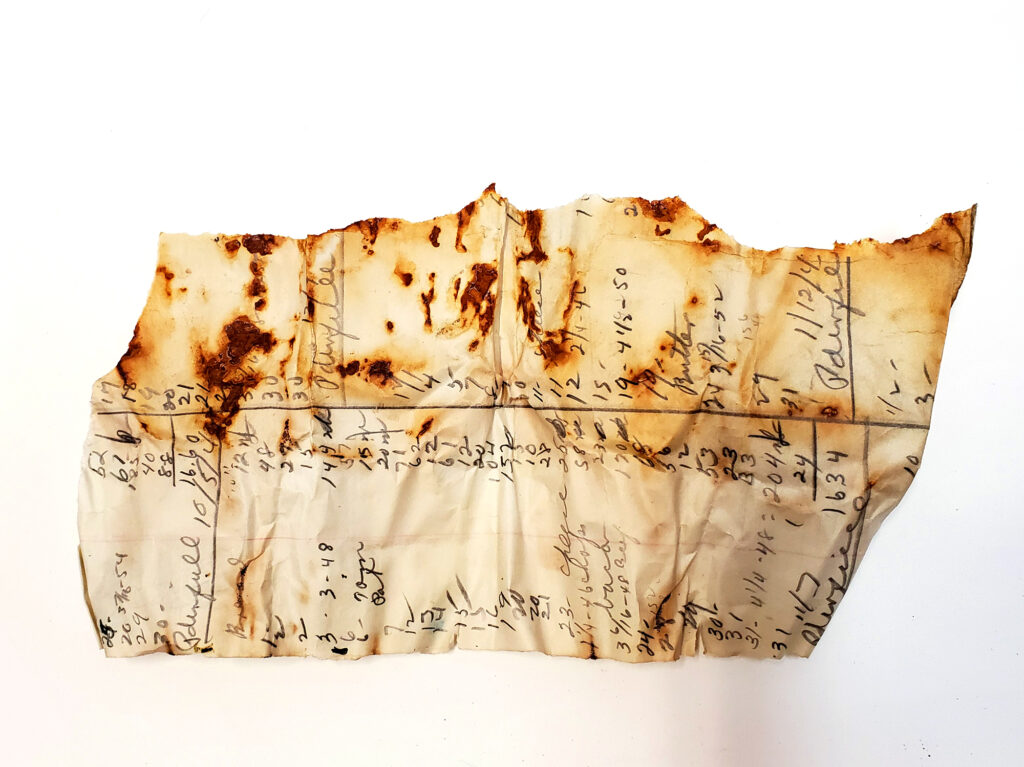
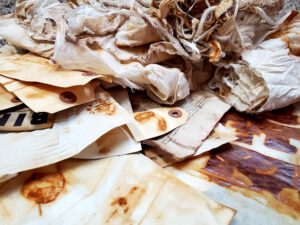
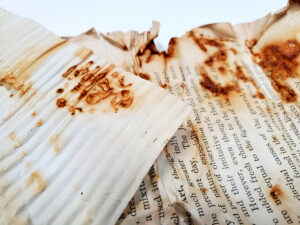
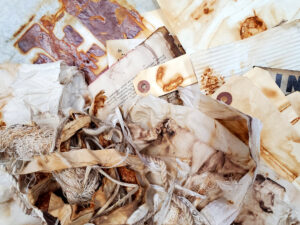
the results (heck yes!)
The best part! check out what happened between the different dye-ables & rusty bits. Layered papers… fibers… twines… tied goods. SO.MUCH.GOODNESS. Scroll to the end of this workshop page for some incredible snapshots of my results. Don’t forget to download your freebie hi-res printables AND check out the optional printable package.
Supplies:
For the most part this is a pretty general list of things you’ll need. I no longer have a kit for rust dyeying, but take a look through UmWowStudio.com for some fun vintage ephemera & fibers that can dye well. SHOP YOUR STASH & make note of what works & what doesn’t. Truly, the supply list is for your reference♥
General Supplies
Paper Based Goods
Fiber Based Goods
- Squirt bottle
- Water (tap / distilled / drinking)
- Distilled White Vinegar
- Baking Tray
- Rusty bits
- Dye-able goods
- Scissors
- Canson Watercolor Paper
- Manilla Tags
- Deli Paper
- Vintage Book Texts
- Planner Pages
- Graph Papers
- Cardboard
- Muslin (100% cotton)
- Canvas
- Silk
- Roving
- Alpaca yarn
- Baker’s twine
- Jute & Hemp twine